
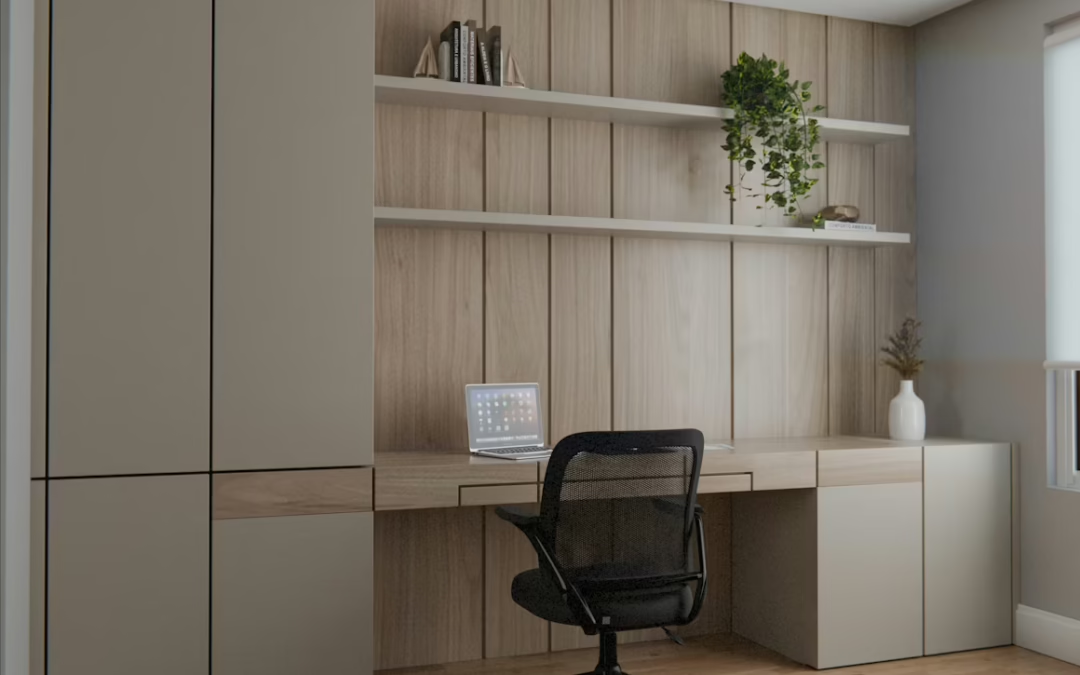
You want precision, durability, and refined design when working with residential cabinet installation experts in your Southwest Florida home. Your cabinetry should enhance daily living while withstanding humidity and coastal conditions.
At Ambiance Creations, we approach cabinet installation with a focus on craftsmanship, material integrity, and seamless integration into your space. We understand how climate, layout, and lifestyle shape cabinetry decisions in Naples, Bonita Springs, and Marco Island.
This guide walks you through cabinet types, installation steps, and design features that elevate both function and style. You’ll gain insight that helps you invest wisely and achieve a polished, lasting result.
How to Choose the Right Professional
Picking the right person or company for your cabinet installation is just as important as selecting the cabinets themselves. The installer you choose affects the quality of the fit, the durability of the finished product, and how smoothly the entire project runs.
Cabinet Installer vs. Carpenter vs. General Contractor
Not every woodworker is the right fit for your cabinet project. A dedicated cabinet installer specializes in this exact type of work and knows how to handle leveling, shimming, and securing cabinets to walls with precision.
A carpenter has broader woodworking skills and may do a fine job, but cabinet installation isn’t always their main focus. A general contractor manages larger remodeling projects and typically brings in a cabinet specialist for this part of the job.
If your project only involves cabinets, hiring a dedicated installer usually gets you faster results and tighter craftsmanship. For a full kitchen remodel that includes plumbing, electrical, and flooring, a general contractor who coordinates multiple trades may be the better choice.
Licensing, Insurance, and Workmanship Standards
Always confirm that your installer carries a valid license in your state. Licensing requirements vary, but most states require some form of contractor registration for projects over a certain dollar amount.
Insurance matters just as much. Ask for proof of general liability coverage and workers’ comp; without these, you could be on the hook for damage or injuries during the project.
Look for installers who follow manufacturer guidelines for the cabinets you’ve picked. Proper installation methods protect your warranty and make sure the cabinets perform as designed.
What to Look for in Reviews, Portfolios, and Estimates
Start by reading recent online reviews. Pay attention to comments about punctuality, communication, and the installer’s handling of problems that arose during the job.
Ask to see a portfolio of completed projects, especially ones that match your scope. A good installer will be happy to show photos of past kitchen cabinets, bathroom vanities, and other residential work.
Get at least three written estimates. Each one should break down material costs, labor, and any extra charges. Be wary of quotes that are way lower than the others; sometimes that means corners are being cut.
Types of Cabinets and How They Affect the Job
The type of cabinet you choose directly impacts cost, lead time, and installation complexity. Stock, semi-custom, and custom cabinets each come with their own trade-offs in price, flexibility, and the level of skill needed to install them properly.
Stock, Semi-Custom, and Custom Cabinet Options
Stock cabinets come in standard sizes and are ready to ship quickly. They’re the most affordable option, but choices in color, door style, and dimensions are limited.
If your kitchen layout works with standard measurements, stock cabinets keep costs low and installation pretty straightforward. Semi-custom cabinets offer more flexibility.
You can adjust sizes in small increments, pick from a wider range of finishes, and add features like soft-close hinges. They cost more than stock and take longer to arrive, usually four to eight weeks.
Custom cabinets are built to your exact specifications. You control every detail, from wood species and finish to interior accessories and dimensions. Lead times can stretch to 10 to 16 weeks, and costs can run $500 to $1,200 per linear foot.
Best Uses for Kitchen Cabinets and Other Residential Spaces
Kitchen cabinets see the heaviest daily use, so durability and a smart layout matter most here. Bathrooms benefit from moisture-resistant materials and compact designs.
Laundry rooms, mudrooms, and garages often work well with stock or semi-custom options since exact sizing isn’t as critical. For home offices or living spaces, custom cabinets let you design around specific items like printers, bookshelves, or display areas.
Fit, Finish, and Storage Features That Change Installation Complexity
Cabinets with non-standard dimensions, angled corners, or built-in accessories require more time and skill to install. Features like pull-out trays, lazy Susans, and integrated dividers add steps during setup.
Frameless (European-style) cabinets demand tighter tolerances for alignment. Framed cabinets are more forgiving but still require careful leveling.
The more detailed your cabinet selection, the more you benefit from working with experienced residential cabinet installation experts.
What the Installation Process Looks Like
A professional cabinet installation follows a clear sequence that keeps the project on track and protects your home. Each phase builds on the one before it, from initial measurements to the final door adjustment.
Measuring, Planning, and Site Preparation
Accurate measurements are the foundation of a good installation. Your installer will measure wall lengths, ceiling heights, and the locations of plumbing, electrical outlets, and windows.
These measurements determine where each cabinet sits and how the layout flows. During planning, you’ll confirm the placement of appliances, the sink, and any special features.
The installer may create a layout drawing or use software to map out the project. Site preparation includes clearing the work area. Everything on countertops and inside existing cabinets needs to be removed before the crew arrives.
Removal of Old Cabinetry and Surface Corrections
If you have existing kitchen cabinets, the installer will disconnect plumbing and electrical connections, then carefully remove the old units. This step often reveals wall damage, uneven surfaces, or outdated wiring.
Drywall patches, stud reinforcement, and minor floor repairs may be needed before new cabinets go in. Skipping these corrections leads to cabinets that sit unevenly or pull away from walls over time.
Leveling, Securing, Hardware, and Final Adjustments
Installation typically starts with the upper wall cabinets, using a ledger board for temporary support. Base cabinets follow, beginning at the corner positions and working outward.
Each cabinet is leveled, shimmed, and screwed into wall studs. Installers check for plumbing at every step.
Once all units are secured, they install doors, drawer fronts, hinges, and pulls. The final phase includes:
- Adjusting doors and drawers for smooth operation
- Installing trim, crown molding, and toe kicks
- Filling gaps with filler strips or caulk
- A full walkthrough to confirm everything meets your expectations
Project Costs, Timelines, and Scope
Budget and schedule are two of the biggest concerns for any cabinet installation project. Costs vary widely based on your choices.
Main Factors That Influence Price
Most homeowners spend between $2,000 and $11,000 on cabinet installation, with the average coming in at around $6,300. Here’s a breakdown of the main cost drivers:
- Cabinet type (stock vs. semi-custom vs. custom cabinets) Biggest cost variable
- Number of cabinets: More units equal more labor
- Material (solid wood vs. MDF vs. plywood) Wood costs more
- Kitchen size and layout complexity, L-shapes, and corners add time
- Labor rates in your area, Metro areas run higher
- Old cabinet removal Adds $300 to $500+
Labor alone typically falls between $1,000 and $4,000 for a standard kitchen, with hourly rates ranging from about $28 to $95 depending on your region.
Typical Residential Installation Timeframes
A standard kitchen cabinet installation takes two to five days. A simple stock cabinet swap in a small kitchen might wrap up in two days.
Custom cabinets in a large or tricky layout can push the timeline to a full week. A rough daily schedule looks like this:
- Day 1: Removal and site prep
- Days 2–3: Base and wall cabinet installation
- Day 4: Trim, hardware, and finishing
- Day 5: Final adjustments and cleanup
Upgrades and Add-Ons That Affect Labor
Extras like under-cabinet lighting, pull-out shelving, and glass-front doors add labor hours. Crown molding installation requires precise angle cuts and extra fitting time.
Soft-close mechanisms, built-in spice racks, and appliance garages are popular upgrades, but each one adds to both material and installation costs. If your investment allows, these add-ons are easier and cheaper to include during the initial installation than to retrofit later.
Design Features That Improve Function and Value
Smart cabinet design goes beyond looks. The right features make your daily routine easier and can increase your home’s resale value.
Storage Accessories and Space-Saving Upgrades
Small additions inside your kitchen cabinets make a big difference in daily use. Consider these popular options:
- Pull-out trash and recycling bins that hide waste and free up floor space
- Lazy Susans for deep corner cabinets
- Pull-out spice racks mounted inside cabinet doors
- Tray dividers for baking sheets and cutting boards
- Deep drawer inserts for pots, pans, and utensils
These accessories maximize every inch of storage, especially in smaller kitchens where counter and floor space is limited.
Lighting, Hardware, and Finish Details
Under-cabinet lighting is one of the simplest upgrades that makes the biggest visual impact. LED strip lights or puck lights brighten countertop work areas and create a warm ambiance in the evenings.
Hardware choices like knobs, pulls, and hinges affect both the look and feel of your cabinets. Soft-close hinges eliminate slamming, and high-quality pulls in brushed nickel, matte black, or brass can update the entire room.
Finish details like painted vs. stained surfaces, glass-panel doors, and open shelving sections all shape the final appearance.
When Customization Delivers the Best Return
Custom cabinets make the most financial sense when you have unusual room dimensions, specific storage needs, or high-end design goals. In a kitchen that serves as the main gathering space, custom cabinetry often recovers a large share of its cost at resale.
For secondary spaces like guest bathrooms or utility rooms, semi-custom or stock options usually deliver enough quality without the premium price tag.
How to Prepare for a Smooth Installation Day
A little preparation on your end keeps the project running on schedule and protects the rest of your home during the work. Clear communication with your installer before the first day prevents most common headaches.
Questions to Ask Before Work Begins
Before your installer starts, get clear answers to these questions:
- What’s the full project timeline, including any buffer days?
- Who’s responsible for disconnecting and reconnecting the plumbing and electrical systems?
- Will old cabinets be hauled away, and is that included in the cost?
- What happens if hidden damage is found behind old cabinets?
- Is there a written warranty on the workmanship?
A reputable cabinet installation professional will answer all of these without hesitation. If you’re working with a general contractor who subcontracts the cabinet work, confirm who your direct point of contact will be throughout the job.
How to Protect Floors, Counters, and Adjacent Rooms
Remove all items from inside and on top of existing cabinets well before installation day. Pack up dishes, small appliances, and anything breakable.
Cover the flooring in the work area with drop cloths or heavy-duty paper to prevent scratches and scuffs. If adjacent rooms share an open floor plan, tape plastic sheeting over doorways to contain dust.
Plan for limited kitchen access during the project. Set up a temporary station with a microwave, coffee maker, and basic supplies in another room.
Post-Installation Walkthrough and Punch List Tips
Once the work wraps up, walk through the entire installation with your installer. Open and close every door and drawer, do not skip any.
Check that all the hardware feels tight and lines up the way it should. If you spot a wobble or a crooked handle, point it out.
Keep an eye out for these issues:
- Gaps between cabinets and the walls or ceiling
- Doors or drawers that do not quite line up
- Scratches, dents, or any finish imperfections
- Soft-close mechanisms that do not work right
- Cabinets that shift if you give them a push
Jot down anything that needs fixing on a punch list. A good installer will usually handle these details within a few days. Make sure you get the punch list signed off before handing over the final payment.
Your Southwest Florida Home Deserves Expert Cabinet Installation
Working with residential cabinet installation experts ensures your cabinetry performs as beautifully as it looks. Precision installation, durable materials, and thoughtful planning create a result that enhances both daily use and long-term value.
At Ambiance Creations, we deliver a seamless experience through white-glove coordination, expert craftsmanship, and deep knowledge of Southwest Florida homes. We align every detail with your lifestyle, from humidity-resistant materials to refined finishing touches.
When you’re ready to elevate your space with cabinetry designed and installed to exacting standards, take the next step with confidence. Get in touch to create a home that feels tailored, functional, and enduring.
Frequently Asked Questions
What do residential cabinet installation experts handle in Southwest Florida homes?
Residential cabinet installation experts manage measuring, layout planning, secure installation, and final adjustments. In Southwest Florida, they also consider humidity, airflow, and material stability. This ensures your cabinets maintain alignment and durability over time.
How long does cabinet installation take for a typical kitchen in Naples or Bonita Springs?
Most standard kitchen installations take two to five days, depending on layout and cabinet type. Larger or custom projects in Naples or Bonita Springs may extend to a full week. Timelines also shift if site repairs or upgrades are required before installation begins.
Which cabinet materials perform best in Southwest Florida’s humid climate?
Moisture-resistant materials like marine-grade plywood, high-quality laminates, and sealed hardwoods perform best. These materials resist warping and maintain structural integrity in coastal conditions. Proper finishes and ventilation further protect your cabinetry investment.
Should I choose custom or semi-custom cabinets for my Marco Island home?
Custom cabinets work best when your space has unique dimensions or high-end design goals. Semi-custom options offer flexibility with shorter lead times and lower investment. The right choice depends on how tailored you want your storage and overall aesthetic.
What preparation is required before cabinet installation begins?
You should clear all cabinets, remove personal items, and ensure easy access to the workspace. Installers also need confirmed appliance placements and utility connections before starting. This preparation helps avoid delays and keeps the project running smoothly.
Do cabinet installers coordinate with other trades during the project?
Yes, cabinet installers often work alongside electricians, plumbers, and flooring specialists. Coordination ensures proper sequencing and avoids conflicts during installation. In design-build projects, this alignment creates a more efficient and refined result.
What should I check after the cabinet installation is complete?
You should inspect alignment, door movement, and hardware placement during the final walkthrough. Look for gaps, surface imperfections, or adjustments that need attention. If you’re planning a full renovation, view our work to see how expert installation elevates your entire home.