
Kitchen cabinet installation often feels overwhelming when measurements are off, walls are uneven, or cabinets do not align as expected. Small mistakes can quickly lead to gaps, instability, and a finished look that falls short of your vision.
At Ambiance Creations, we understand that homeowners want a process that is clear, efficient, and delivers a refined result without unnecessary stress. A well-planned installation solves common frustrations while improving both function and flow.
This guide breaks down each step of kitchen cabinet installation with practical insight, helping you avoid costly errors and achieve a seamless, polished outcome.
Preparing for Kitchen Cabinet Installation
Getting your space ready before kitchen cabinet installation can prevent delays and unnecessary adjustments. Accurate measurements, proper tools, and careful removal of existing cabinetry create a smoother process and a more refined outcome.
Measuring and Planning Your Layout
Start by measuring every wall where cabinets will be installed, noting windows, doors, and appliances clearly on your plan. A simple floor layout helps maintain organization and reduces confusion as the project progresses.
Check walls for level and plumb using a long level, and document any irregularities. Measure floor-to-ceiling heights in multiple locations, since surfaces are rarely consistent, and mark a level line at 34.5 inches for base cabinets and 54 inches for upper cabinets.
Locate wall studs with a stud finder and mark them clearly. Proper anchoring into studs is essential for stability and long-term performance.
Gathering Essential Tools and Materials
Prepare all required tools before beginning to avoid interruptions during installation. A drill with bits, a long level, a tape measure, and a stud finder form the core of your setup.
Additional tools, such as a circular saw or table saw for filler strips, and a jigsaw for cutouts, help ensure accuracy. Supporting materials like cabinet screws, wood shims, and filler strips should be organized and accessible throughout the process.
Keep safety equipment nearby and consider working with a helper, especially when positioning upper cabinets. A stable workspace, such as sawhorses or a workbench, also improves efficiency.
Removing Old Cabinets Safely
Before removal, turn off power to outlets and lighting in the work area to ensure safety. Empty cabinets completely and remove doors and hardware first to reduce weight and improve handling.
Begin with upper cabinets, unscrewing them while ensuring proper support to prevent damage or injury. Be mindful of plumbing and electrical components before cutting or prying any surfaces.
Carefully remove base cabinets and disconnect plumbing as needed. Use a utility knife to cut through caulk or paint lines for a clean separation from walls and countertops.
Choosing the Right Cabinets
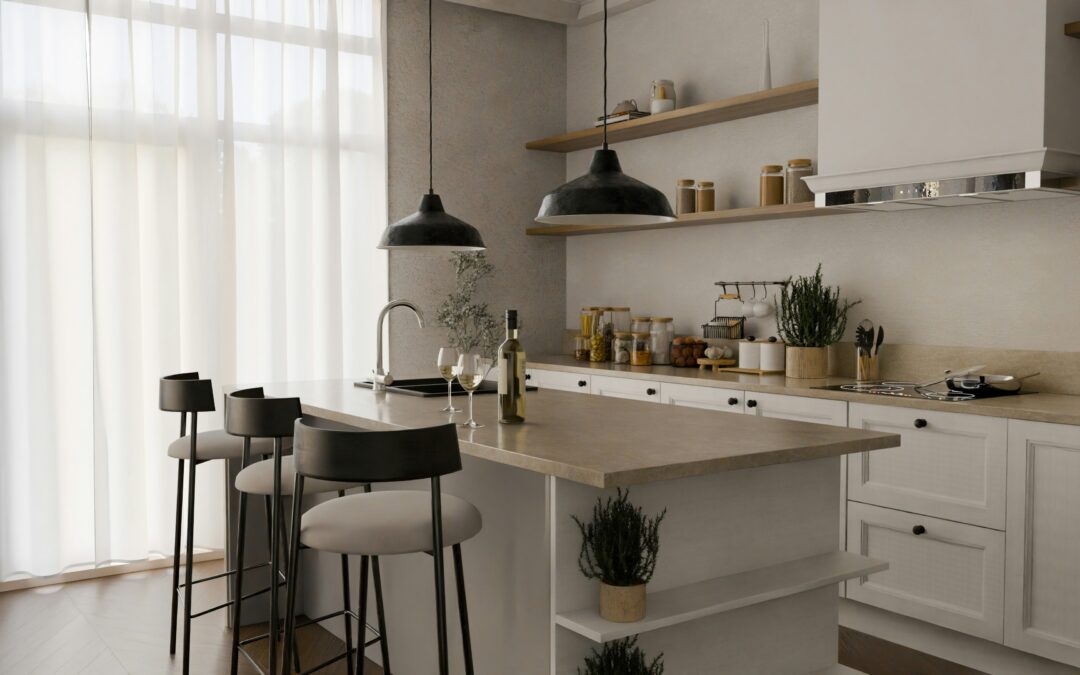
The cabinets you select define both the visual direction and functionality of your kitchen. Style, construction, and storage solutions should align with how the space is used while supporting a cohesive design vision.
Selecting Cabinet Styles and Finishes
Cabinet style establishes the overall tone of the kitchen, whether classic, modern, or transitional. Shaker cabinets offer a timeless look, while flat-panel designs create a streamlined, contemporary feel, and raised-panel options introduce depth and detail.
Glass-front cabinets can add visual interest and break up solid surfaces. Finish selection plays an equally important role, with painted options offering versatility and stained finishes highlighting natural wood character.
Lighter tones tend to minimize visible wear, while matte finishes help soften imperfections and create a more understated appearance.
Custom vs. Prefabricated Cabinets
Stock cabinets are available in standard sizes and are well-suited for straightforward layouts. Semi-custom options provide more flexibility, allowing for tailored features and expanded design choices.
Custom cabinetry is built to exact specifications, making it ideal for unique layouts or when a higher level of personalization is desired. This approach ensures every inch of space is utilized effectively.
The structure and complexity of your kitchen often determine which solution delivers the best balance of performance and design.
Evaluating Storage Needs
Begin by assessing what you need to store and organizing items into categories. This process reveals how much space is required and highlights opportunities for improved organization.
Deep drawers are often more functional for cookware, while specialized corner solutions help maximize otherwise unused areas. Extending cabinets to the ceiling increases storage and creates a more cohesive appearance.
Combining drawers, shelves, and specialty storage elements ensures flexibility and long-term usability as needs evolve.
Step-by-Step Kitchen Cabinet Installation Process
A successful kitchen cabinet installation depends on careful sequencing and attention to detail. Each stage builds on the previous one, creating a structured and efficient workflow.
Marking Reference Lines and Stud Locations
Begin by marking all wall studs from floor to ceiling to establish secure anchoring points. Draw a level line at 34.5 inches for base cabinets and 54 inches for upper cabinets to guide placement.
Add vertical lines at each stud location to ensure precise screw positioning. These reference points provide consistency and alignment throughout the installation process.
Securing Upper Cabinets
Install upper cabinets first to maintain accessibility and avoid working over base units. Starting in a corner provides a stable reference point for alignment.
Use temporary supports to hold cabinets at the correct height while securing them to wall studs. Check for level before fastening, and clamp adjacent cabinets together to create a seamless connection across the run.
Installing Base Cabinets
Begin base cabinet installation in the same corner as the upper cabinets to maintain alignment. Use shims to adjust for uneven floors and ensure each cabinet meets the reference line.
Secure the cabinets to wall studs and connect them through the face frames for stability. Continue installing one unit at a time, verifying level and alignment at each step to maintain consistency. Trim excess shims once all cabinets are secured to achieve a clean, finished appearance.
Attaching Cabinet Doors and Hardware
Final adjustments during kitchen cabinet installation ensure your cabinetry looks aligned, balanced, and professionally finished. Follow these steps to achieve consistent spacing and smooth operation across all components.
- Reinstall cabinet doors using pre-installed hinges, ensuring proper alignment and spacing
- Adjust hinges gradually to achieve uniform gaps and smooth operation
- Install drawer fronts carefully, checking placement before securing them
- Add hardware using a template to ensure consistent positioning across all doors and drawers
Addressing Common Challenges
Even with proper planning, challenges can arise during kitchen cabinet installation. Addressing these issues efficiently helps maintain progress and ensures a polished final result.
Dealing With Uneven Walls or Floors
Identify the highest point on the floor and use it as a baseline for leveling cabinets. Shims allow you to compensate for irregularities and maintain consistent alignment. Small gaps can be filled with caulk, while larger spaces may require filler strips or molding to achieve a seamless finish.
Making Precise Cuts and Fittings
Accurate measurements are critical for clean installations, so verify dimensions carefully before cutting. Using sharp blades and protective tape helps prevent splintering and maintains a refined finish.
Templates are especially useful for complex cuts around pipes or outlets. Finishing edges with sanding or touch-up materials ensures a cohesive appearance.
Aligning Cabinet Doors Properly
Proper door alignment significantly impacts the overall look of the kitchen. Adjust hinges incrementally to achieve even spacing and smooth operation across all cabinets.
Review alignment from multiple angles and make small corrections as needed. Once satisfied, secure all hardware and recheck alignment after initial use.
Finishing Touches and Maintenance
Final steps enhance durability and refine the appearance of your cabinets. Consistent care ensures your kitchen cabinet installation remains in excellent condition over time.
Applying Caulk and Trim
Apply a thin bead of paintable caulk along seams to seal gaps and protect against moisture. Smooth immediately for a clean, professional finish that blends with surrounding surfaces.
Install crown molding and toe kicks to complete the design and conceal structural gaps. Adding hardware last ensures precise alignment and a cohesive final presentation.
Care Tips for Longevity
Routine cleaning with mild soap and a soft cloth helps preserve cabinet finishes. Avoid harsh chemicals that can damage surfaces and compromise longevity. Inspect hinges, screws, and drawer slides periodically, making adjustments as needed to maintain proper function. Keeping shelves organized also prevents unnecessary strain on materials.
Troubleshooting Squeaks and Loose Hinges
Squeaky hinges can be resolved with a small amount of lubricant applied to hinge pins. Opening and closing the door helps distribute the lubricant evenly and restore smooth movement.
Loose screws should be tightened promptly, and stripped holes can be repaired with filler before reinstalling hardware. Adjust hinges gradually to correct alignment and replace damaged components when necessary.
Kitchen Cabinet Installation Without The Stress
A thoughtful approach to kitchen cabinet installation results in a space that performs beautifully while reflecting intentional design. Every step, from planning to final adjustments, contributes to a refined and lasting outcome.
Attention to detail, proper sequencing, and quality materials ensure that your kitchen not only looks exceptional but also functions effortlessly. Small refinements throughout the process can significantly elevate the final result.
At Ambiance Creations, we bring a service-first mindset to every project, delivering craftsmanship and individuality in every detail. Get in touch to begin your transformation.
Frequently Asked Questions
What is the most important step in kitchen cabinet installation?
The most important step in kitchen cabinet installation is accurate measurement and planning. Ensuring your layout is level and properly aligned from the beginning prevents issues like uneven cabinets, gaps, and misaligned doors later in the process. A strong foundation sets the tone for the entire installation and helps everything fit together seamlessly.
Should upper or base cabinets be installed first?
Upper cabinets should always be installed first to maintain clear access to the wall. This prevents the need to work over base cabinets and reduces the risk of damage during installation. Starting with uppers also allows for better alignment and a more controlled workflow throughout the project.
How do you ensure cabinets are level on uneven floors?
To handle uneven floors, installers identify the highest point and use it as a reference. Shims are then placed under cabinets to create a level surface across the entire run. Consistently checking for level during installation ensures stability and a clean, professional appearance.
Can I install kitchen cabinets without professional help?
Yes, many homeowners take on kitchen cabinet installation themselves with the right tools and preparation. However, the process requires patience, precision, and attention to detail. For more complex layouts or higher-end finishes, professional guidance can help achieve a more refined result.
How long does kitchen cabinet installation take?
The timeline for kitchen cabinet installation depends on the size of the kitchen and the complexity of the design. A straightforward project may take a couple of days, while more detailed installations can take longer. Proper planning and preparation can significantly reduce delays and improve efficiency.
What causes cabinet doors to become misaligned?
Cabinet doors often become misaligned due to minor shifts in hinges or improper initial adjustments. Regular use can also loosen screws over time, affecting alignment. Fortunately, most modern hinges allow for easy adjustments, making it simple to restore proper spacing and function.
How do I maintain cabinets after installation?
Maintaining cabinets involves regular cleaning with mild soap and a soft cloth, along with periodic checks of hinges and hardware. Avoiding excess moisture and harsh chemicals helps preserve the finish. Routine care ensures your cabinets remain functional and visually appealing for years to come.